
DIY Clay Air Plant Wall Hanger
Are you looking for some cute ways to display the worlds weirdest/coolest plants?!
Since we moved I’m in full on plant lady + affordable decor + DIY mode.
Today I’m really excited to share with you this fun air plant vase I created in partnership with Sculpey.
First up! The Inspiration!
I was inspired by these images to create my own wall mounted holder.

The shape from #1, the colors from #2 and the coral/floral images from #3.
Ps. Learn more about decoding inspiration to use in your own art here.
Let's Talk Air Plants!
The beauty of air plants is that they actually HAVE to stay dry - so clay is a fun way to create any kind of planter you’d like for them. Plus they are very low maintenance. You simply give them a little water bath once a week, let them completely dry out, and then pop them back in their holders. I got mine from this shop and was really happy with the shop - plus! they donate to Pencils of Promise for every purchase so you're creating good in the world through your creativity! They came quickly and safely with great care instructions and are so affordable - plus they will continue to propagate and grow more of themselves!
Let's Talk Clay!
Mustard yellow is one of my all time favorite colors and I’ve been mixing clays trying to find the perfect shade for years but now Sculpey has come out with the perfect shade - no mixing! It’s exclusive to sculpey.com and you can get your hands on some on 9/22/20.
To celebrate this new, dreamy shade, lets create a fun wall mounted air plant vase together!
A note about clay types: my personal preference is Sculpey souffle or premo. They are great to work with, don’t dry out, can be stored and reused and are safe to bake in your oven at home. I store my leftovers in ziplock bags and use them in home decor and jewelry projects.

Grab Your Supplies
Workspace
- Clean surface such as a tile, wax paper or desk
Tools
- This pack has all the tools you'll need + some!
- Roller
- Clay blades are really handy
- A paperclip or tool like this
- Clay knife
Clay
Baking
- Baking Sheet
- Oven
- Piece of cardboard
Hanging
- Nail
- String
A note about your workspace:
You can use wax paper or a tile or just your table to work on. Just be sure its really clean so your clay doesn’t pick up any fuzz or other colors, so be sure to wipe it down and wash your hands between colors.


Let's Create!
To get started You need to condition your clay. You want it to be warm and smooth to the touch so it’s really malleable so you don’t get any air bubbles when you bake. Start by rolling it in your hands to warm it up and smash smash smash it until it’s really easy to work with. If it gets too hot and it’s sticking to your hands just let it sit out for a few minutes or pop it in the fridge and then come back to it. But this is a really important step because you need it to be as conditioned as possible to keep it from bubbling when we bake it.
Next you’re going to want to roll out a flat slab. You can do this by lying two of the same thickness rulers side-by-side and using them as your guide to make sure your surface is even. Shoot for about a quarter of an inch thick. You don’t want to go too thin or it’ll be impossible to work with, so ere on the side of thicker than thinner.


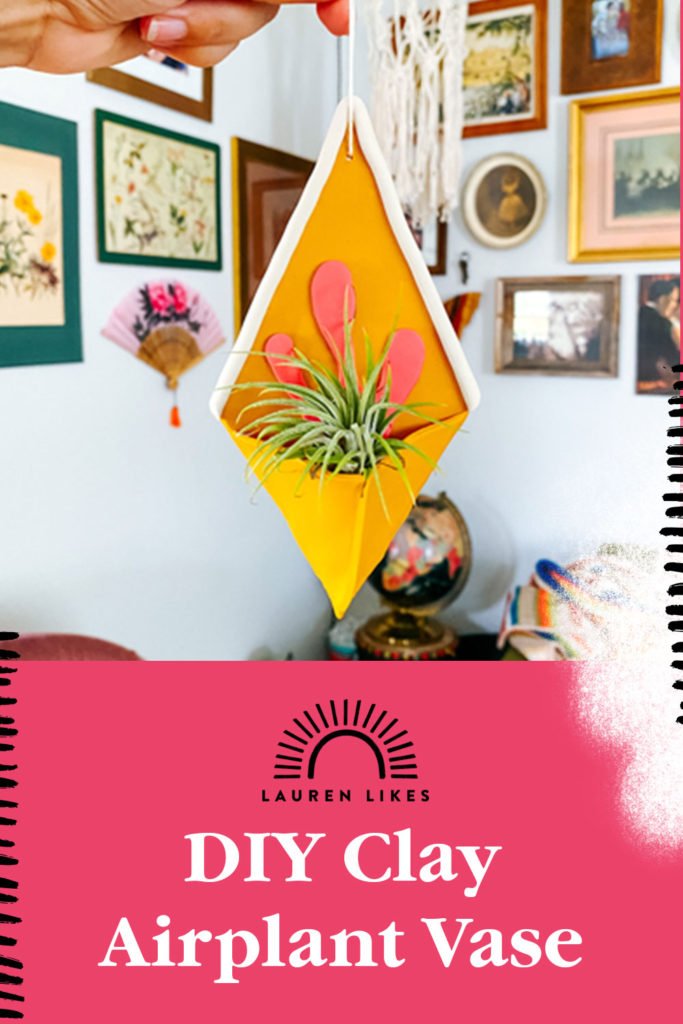
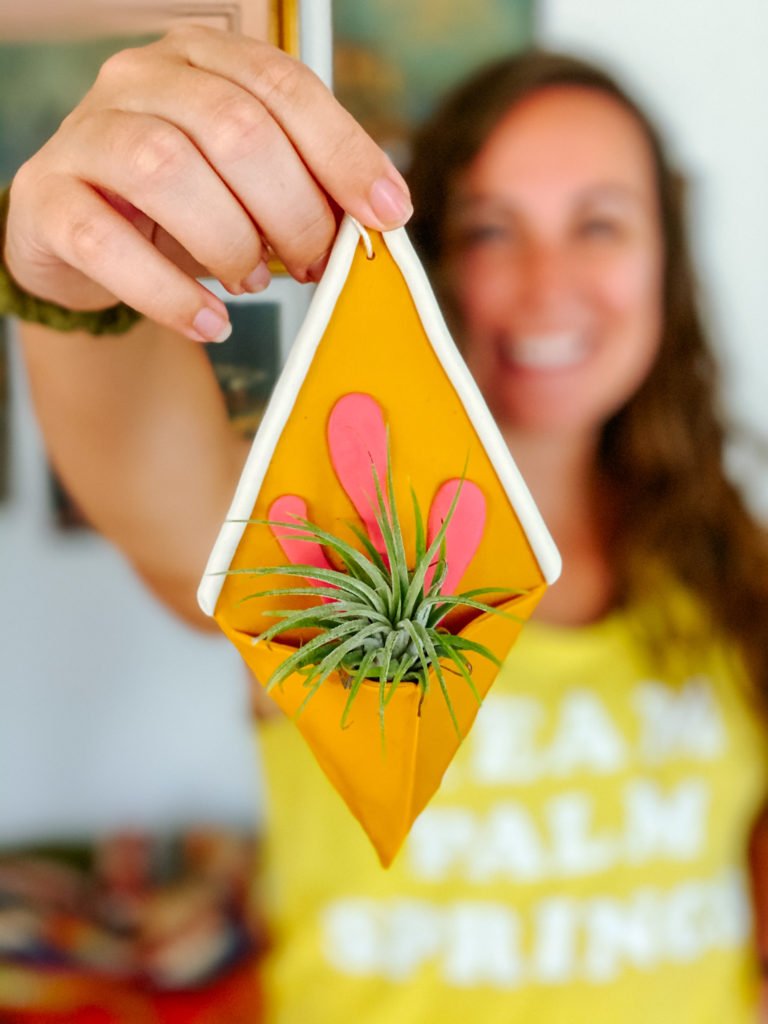
Once you’ve rolled it out smooth I used the rulers to create cutting guide lines to create my diamond base shape and I used the clay blades to make sure my lines were super straight. I laid my air plant in here to help guide me so it would be the right size for the plant I chose.


Next, I created two triangles that fit the size of my base to create the space that will hold the air plant. Attach them to one another and then to your base by pinching at the clay and smoothing them down together like you learned to do in elementary school when you made a pinch pot. A very gentle touch repeatedly will give you great results.


For a bit of detail I wanted to create an outline, like you saw in my inspiration photos. You can do this by rolling a snake and getting it really even or you can use extruder like this one.
I simply pressed it onto the top of the mustard clay and with a few firm presses it tends to mold them together well enough that they will bind when baked. You can always add some liquid clay or score the clay to be sure that it adheres but I have never had an issue as long as I give them a firm press together


For the last detail I cut out that funky coral shape. I used a pencil and sketched it out by hand and then used my knife tool to cut it out. Then again, with a gentle finger, I smoothed the edges down and did another firm press onto the base and it sealed great.


Let's Bake!
Dont forget!! Use a paperclip or this tool to poke a hole to hang your vase BEFORE baking.
QuickTip: I use the clay blades to peel the clay off my work surface if it gets stuck.


Last, if you're worried about the base holding it's shape you can cut a small piece of cardboard in the shape/size of your plant holder and insert it. I baked mine in for about 10 minutes to solidify the shape and then removed it.
Now it’s time to bake! I recommend doing a test bake before you begin. Grab a small chunk of white clay and bake it in your oven at 275 and check it every 10 minutes for 40 to 50 minutes. Make sure it does not change colors. I bake my clay at 275° for 40 to 50 minutes.


Next simply hang your vase after letting it cool for about 30 minutes and pop in your air plant.
How cute are these?! I already have more ideas and cannot wait to get my hands on even more of that mustard clay! It’s perfect for fall crafting.
What will you create?!
Thank you so much to Sculpey for partnering with me to create this post. All opinions and ideas are my own and please know that I only work with companies whose products I already own, use, and love.